Section "Schedules"
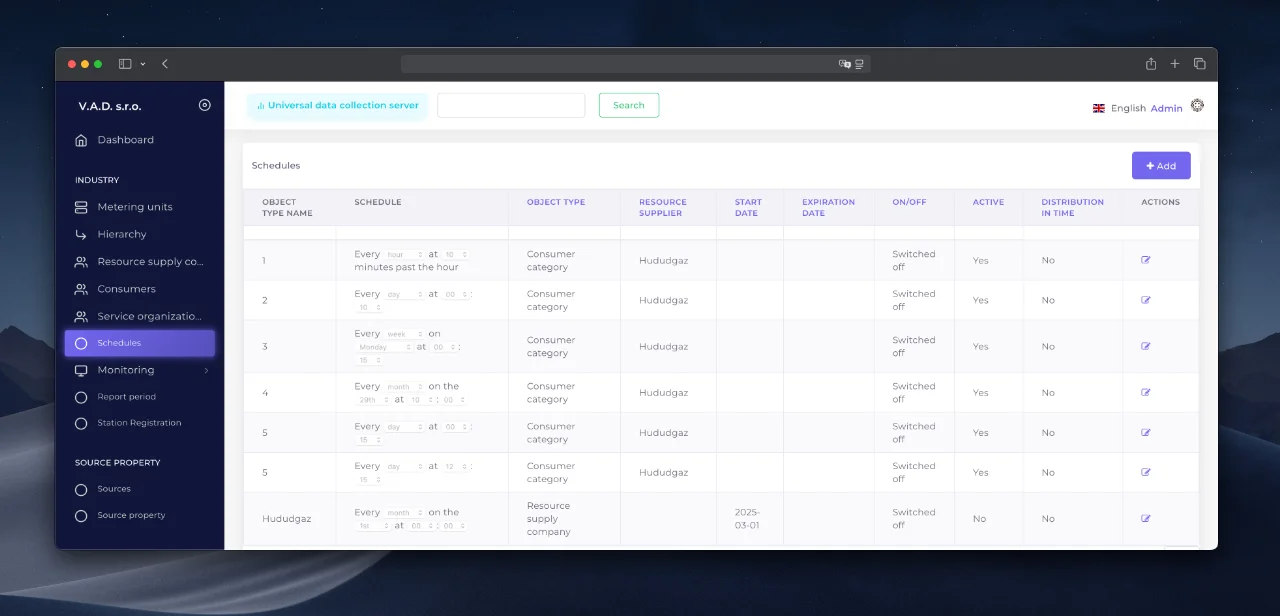
The Schedules section of the IoT platform is designed to manage communication sessions between telemetry units and the server. It allows you to:
- Create flexible schedules for devices to communicate;
- Configure global and local data transfer rules;
- Control the frequency of information collection, taking into account the characteristics of objects.
Access requirements
The Schedules section is available to users with the following rights:
- An account of at least the second access level (for resource providers/service organizations);
- The “Schedule” permission enabled in the account settings.
Section interface
The interface is divided into two main areas:
- Results and navigation area Contains a list of schedules.
- Functional area Includes tools for sorting data and managing records.

Working with data
Creating a schedule
- Go to the “Schedule” section via the navigation menu.
- Click the “Add” button.
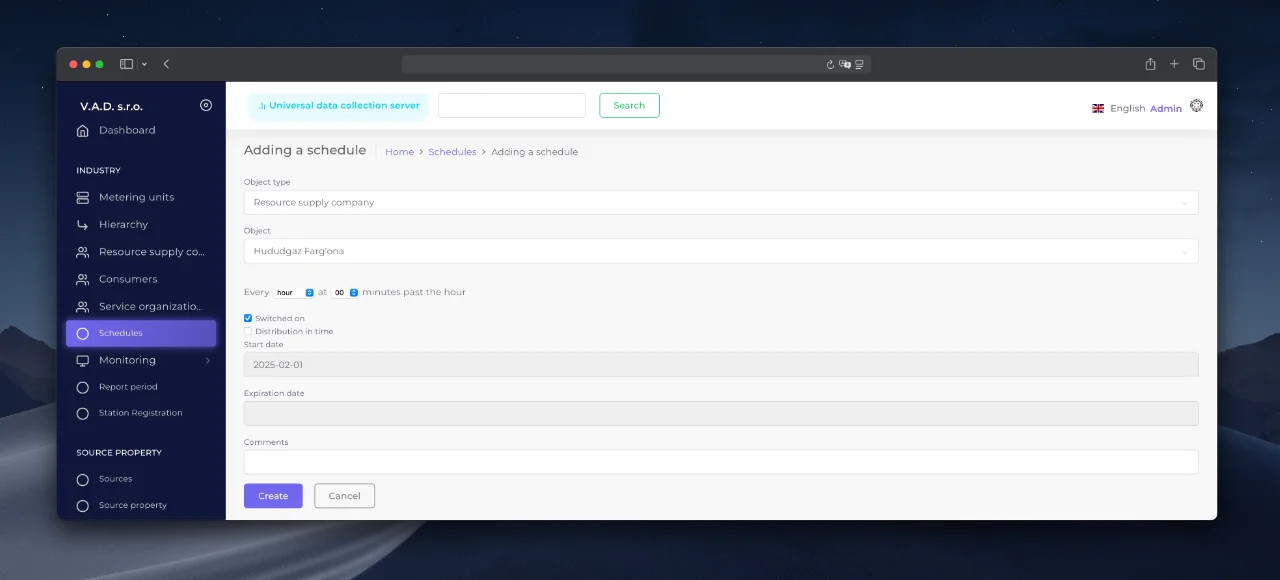
- Fill out the form.
- Confirm the action with the “Add” button.
Warning
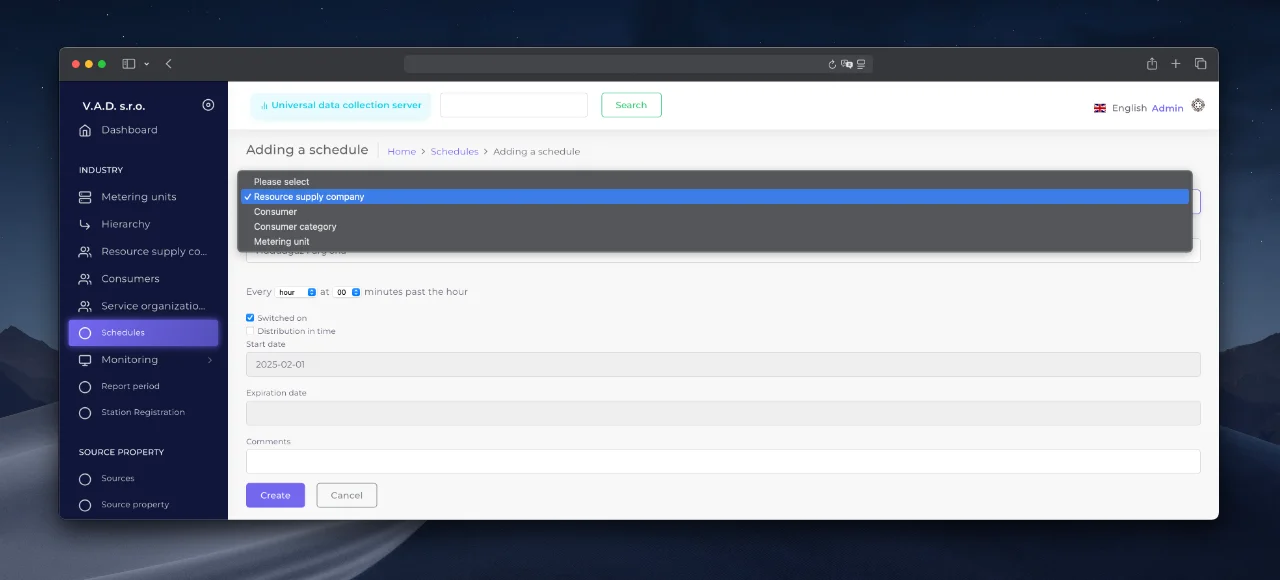
The form has a dynamic appearance - when the key field “Object Type” is changed, the set of fields to fill in changes.
Form Fields:
- Object Type - defines the scope of the schedule: required
- Resource Supply Company - applies to all supplier metering units;
- Supplying Company + Consumption Indicator - takes into account categories (e.g. stand-alone units);
- Consumer - only for units of the selected consumer;
- Metering unit - individual schedule for a specific unit.
- Subject - selection of an object for schedule assignment.
- Periodicity of polling - interval of communication sessions (hour, day, etc.).
- Begin/End Date - the period of validity of the schedule.
- Control Flags:
- *Activated - schedule activation;
- *Time Spread - dynamic spreading of intervals for different devices.
- Comment - additional description.

Types of schedule management
-
Global Applies to all metering units of the energy supplier. Example:
Selecting “Resource Supply Company ” in the Facility Type field. -
Local
Covers individual branches, consumers or metering units.
Examples:- Binding “Resource Supply Company + Consumption Indicator ” - optimization for autopowered devices.
- Select “Consumer ” - control of priority units.

Create a schedule for a specific metering unit
Method 1: Via the “Schedule” module
- Specify “Object type ” - Metering unit.
- Select the desired unit in the “Object ” field.
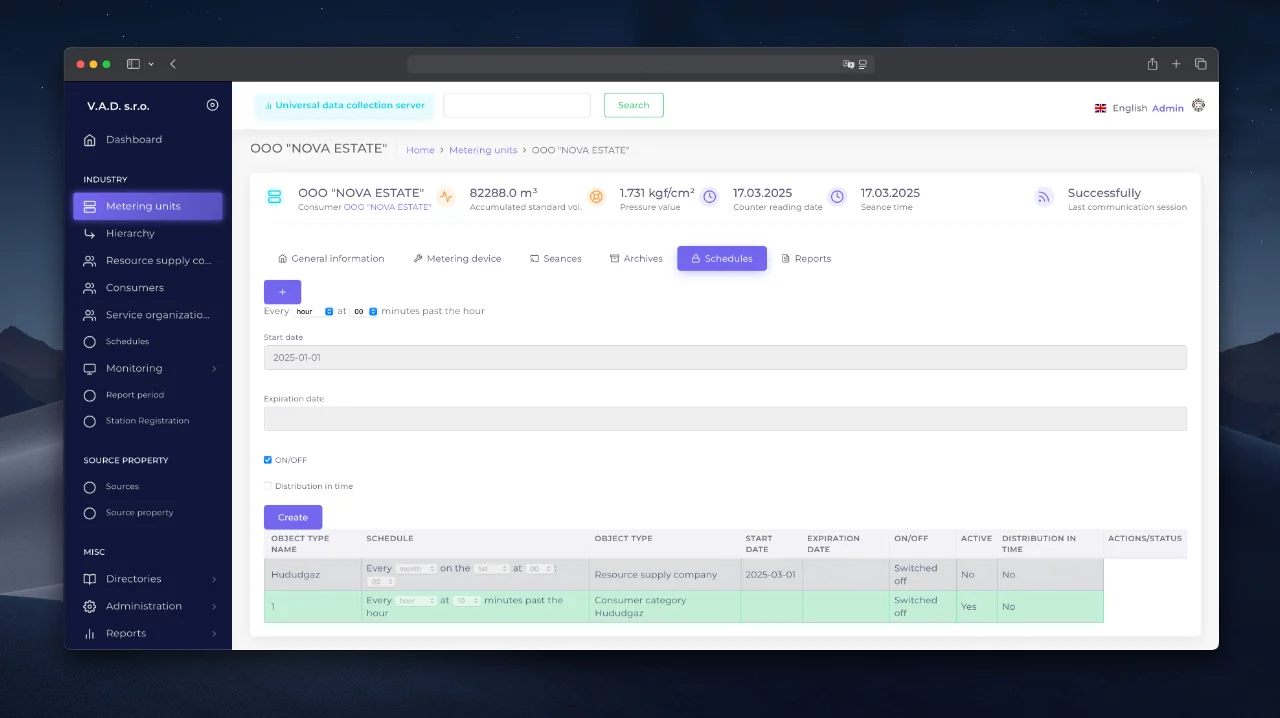
Method 2: From the Unit Card:
- Open the unit in the Metering Units module.
- Click the “Schedule ” tab.
- Click “Add ” and fill in the parameters.

Applying schedules
The settings take effect after the telemetry units are synchronized with the server:
- The user saves the changes to the system.
- The server processes the request.
- The telemetry unit receives the schedule for the next communication session.